
A Customer Account represents the entity you do business with, like a home, HOA, contractor, or company. Contacts are the individual people associated with that Account. Every Customer Account in Workglue must have at least one Contact, and Account names must be unique.
Before you start
Account names must be unique across Workglue. If your company uses the QuickBooks Online integration, the account will sync to QBO as a Customer the first time an Opportunity on that account moves to an Active stage. If the customer already exists in QBO, Workglue links to it instead of creating a duplicate.
Two account-level fields are managed in Custom Fields under Settings: Customer Type and Lead Source. If your company uses the QuickBooks Online integration, Customer Types can also be pulled in from QBO. Set these up before creating accounts so the options appear in the drop-downs.
How to create a Customer Account
There are two ways to start a new Customer Account in Workglue.
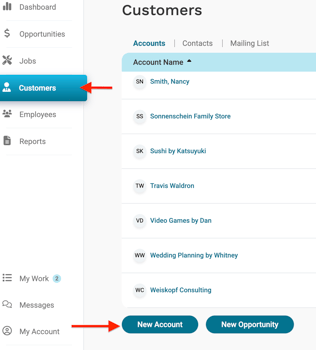
Option 1: From the Customers page
- Go to Customers in the left navigation.
- Make sure you are on the Accounts tab.
- Select New Account in the bottom left.
Option 2: From the global Add menu
- Select the + Add button in the top right of any page.
- Select New Account.

Both options open the same New Account form.
How to fill out the New Account Information section
The top section of the form captures information about the account itself.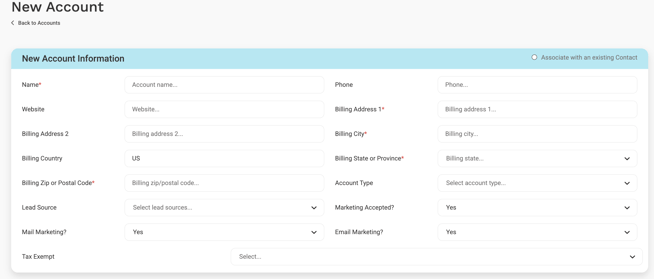
Required fields:
- Name: The account name. Must be unique.
- Billing Address 1: Street address where invoices are sent.
- Billing City
- Billing State or Province
- Billing Zip or Postal Code
Optional fields:
- Phone: Main phone number for the account.
- Website: Account website URL.
- Billing Address 2: Suite, unit, or apartment number.
- Billing Country: Defaults to US.
- Account Type: Pulled from your Customer Types list in Custom Fields. Options vary by company. Common types include Homeowner, Property Manager, and General Contractor. Types with a green QBO tag are synced from QuickBooks Online.
- Lead Source: Pulled from your Lead Sources list in Custom Fields. Tracks how the account first came to your business.
- Marketing Accepted: Account-level marketing consent. Defaults to Yes.
- Mail Marketing: Whether the account opts in to physical mail campaigns. Defaults to Yes.
- Email Marketing: Whether the account opts in to email campaigns. Defaults to Yes.
- Tax Exempt: Yes or No.
Marketing preferences are tracked at both the account level and the contact level. The account-level settings apply to the company or property as a whole, and the contact-level settings apply to each individual person. This lets you keep an account opted in to email campaigns while letting an individual contact at that account opt out, or vice versa.
How to fill out the Primary Contact Information section
Every Customer Account must have a primary contact. You can either create a new contact or associate an existing one.
Create a new primary contact
By default, the Primary Contact section is set up to create a new contact.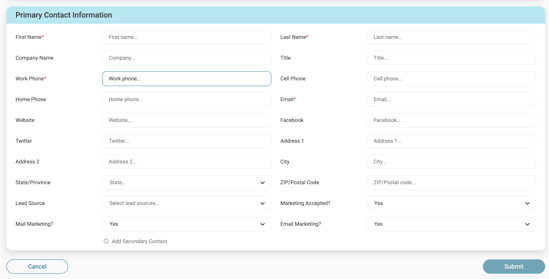
Required fields:
- First Name
- Last Name
- Work Phone
Optional fields:
- Company Name
- Title
- Cell Phone
- Home Phone
- Website
- Address 1
- Address 2
- City
- State/Province
- ZIP/Postal Code
- Lead Source: Pulled from your Lead Sources list in Custom Fields.
- Marketing Accepted: Contact-level marketing consent. Defaults to Yes.
- Mail Marketing: Defaults to Yes.
- Email Marketing: Defaults to Yes.
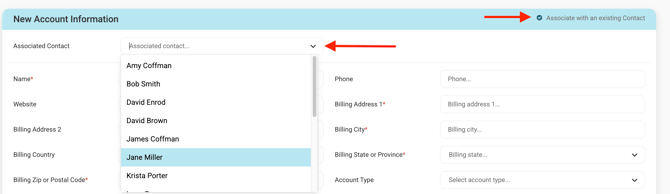
Associate an existing contact
If the person you want to add already exists as a contact in Workglue, you can link them to the new account instead of creating a duplicate.
- Select the Associate with an existing Contact toggle in the top right of the Primary Contact section.
- The Primary Contact fields collapse.
- Select the Associated Contact dropdown and choose the existing contact.
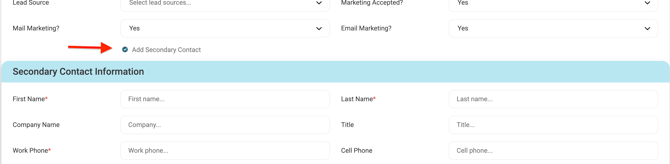
How to add a Secondary Contact
At the bottom of the Primary Contact section, select Add Secondary Contact to expand a second contact form. The Secondary Contact section uses the same fields as the Primary Contact.
Use secondary contacts for situations like a homeowner couple where you need to reach either person, a property manager plus an on-site contact, or a billing contact plus a project contact at a commercial account.
How to save the new account
- Review the form for accuracy.
- Select Save in the bottom right.